|
Some comments:
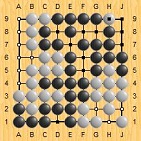
move 11 - Usually, move 9 is played in this circumstance as a probe, to see whether white will respond with a keima or ogeima. Black then switches back to the joseki in the lower right and knows whether he should make the solid or hanging connection to get the ideal extension from his stones. Tenuki from the lower right is playable in some circumstances, but after white cuts and black sacrifices stones, black needs a stronger position in the lower left to supplement his stones.
In addition, taking the corner at this stage of the game is small, and white's choice of direction allows him an ideal approach to the upper-right corner with a nice wall to build a position opposite.
Move 58 - By attacking white from the lower left side at this point in the game, black has removed the shoulder hit at D14 as an option for his upper left group. Normally, when black plays the diagonal, it makes miai of that shoulder hit and the extension to the right. Because black played to allow white to take it in sente, white now takes the second point as well and puts the black group in a tighter spot than it should be.
Move 61 - NOOOOO! When black attaches, black strengthens and stabilizes the white group. White just dropped a few stones into an area of black's influence, so black needs to attack white to make up for the area where he no longer has potential. By strengthening white, black throws his profit to the wind. Also, black is choosing a joseki that ends in gote for black, but white already has one of the stones he would play in the joseki, so not only would black end in gote, he will also STILL owe a move. If you are 8k, it is time to erase this move from your repertoire until you know how to attack the group and make the decision that attacking is the wrong choice.
Move 65 - White has just played a dubious move, trying to have his cake and eat it too. Black should play at P17 to split white and attack the side that white does not strengthen. Building the huge moyo on the right seems like a good idea, but black is putting all his eggs in one basket, and with R10 on the 4th line, it is very easy to invade. Black may not be able to get compensation for the inevitable white invasion.
Move 83 - Don't you wish you had played c18 one move earlier, so you could tenuki white's move? The empty triangle is a sign that black played inefficiently.
Move 88 - Without counting anything in the moyo on the right, black appears to have around 28 points on the board. White has started playing endgame moves, but I'm not sure this move is big enough to be sente. No groups are threatened, and a tenuki will probably cost 15 points or so, maybe 20, as a guess. A reduction in the center would at least equal that, if not be much larger, so it may be worth playing the reduction now, and if white persists in trying to reduce black's moyo, black should reduce white while playing to make a decent center himself. It's important to get to this before white takes gote later to play the giant center move that leaves black scrambling for a response.
As you noted, the stones on the left are plastered against white's wall and not very reliable to say the least, so if you play a move like k4, and need to run, you can't really count on them. I'm looking at a more shallow reduction, like k6, that can run both to the left and to the top right. If white takes his points on the right, black can continue to move deeper into the moyo. If white defends, white has blinked first, and this generally means that you can reduce in sente and follow it up by defending against the move you tenukied.
Move 99 - Black's group is not in danger here, but for his reducing stones to have any meaning, he needs to save them. It's better to give white the 10 or 20 points on the left in exchange for connecting them and ruining the 30 or more points white was looking to get in the center. F7 or F8 look like good candidates. In addition, you don't need to save those particular stones at E5 and G5, so much as the idea of the big reduction.
|


 is saying that you want the outside here. But then you answered
  with
with  , protecting the left side. These two moves do not make sense together.