Seemed appropriate to post this in it's own thread. I didn't sleep last night so I had some fun writing up the first chapter of what will eventually be my own introduction to the game of go. What follows is nothing more than the strict rules and nothing else (zero* strategical ideas). Some of us have been discussing some different rule ideas elsewhere and having some fun getting into the best ways to state clear, concise and yet simple confines of the game. Also, Awhile back, I posted about my personal method for teaching the game to a newcomer which is in the link below. You'll find if you read through this that my approach has changed a lot on certain ideas and concepts.Any comments or critiques will be much appreciated and please let me know if I'm leaving out something important (or anything for that matter; rules are rules and I like to cover the entire scope). Thanks again if you actually read over the entire post. Lastly I should mention that my descriptions of the diagram's are slightly inaccurate. This is because I'm using a different sgf processor for the book itself.
viewtopic.php?f=45&t=12054A complete Introduction to the game of Go Introduction
The game of go is an abstract strategy board game for two players. It is widely considered to be the deepest and most complex board game in the world and is believed to be the oldest game to date still played in its original form. From its origins in China, over 4,000 years ago, the game of go has continued to fascinate people from all walks of life and has been a captivating wonder for mathematicians throughout the ages. The name of the game, “go”, stems from the Japanese word “Igo” which translates “The surrounding board game” and so the signature element of the game is the ability of the players to use their game pieces, called stones, to surround those of the opponent. There are many different myths about where and when the game was created and by whom. However, the most likely theory suggests that go evolved from the practice of Chinese military commanders who would use stones to mark out battle positions on maps and it has been suggested that this is the reason that the game so cleverly captures the essence of real life battle strategies. One key attribute of the game which sets it apart within the family of abstract strategy games is that the rules of the game, as you will soon see, could hardly be simpler and can be learned very quickly. When a new player is taught the basic objective of the game, there is a subtle temptation to view the game as almost comical, like something two children on a playground might have conceived. However, one must not play for very long to develop an appreciation for the astonishing depth of complexity that lies within the strategy of the game. This is a growing appreciation that deepens as a player’s understanding of all the subtle nuances and intricacies increase such that the strongest player’s in the world claim to be far from mastery and find themselves just as puzzled at the game as anyone else. Continue reading for an entire introduction to the basic elements of this marvelous game and be prepared to be challenged in a way like never before. Suitable for anyone from small children to the elderly, this game is sure to entertain for a lifetime, anyone who enjoys a challenge.
Chapter One: The Rules of the Game
The nature of game play:
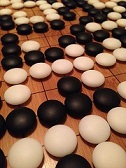
The game of go is played across a board which displays a simple grid of lines, 19 across and 19 over. The following is a picture of an empty go board before the first move of the game has been played. The 19x19 board size is the standard and you will seldom see competitive players using anything else as this has been the custom for at least 2,000 years. However, it is often recommended that total beginners of the game start with the much smaller 9x9 size. This is done to allow the beginner to focus the on the rules and basic concepts without having to be daunted by the sheer complexity of move options afforded on the full size board. Once a player has demonstrated a working understanding of the basic elements of game play, it is then best to spend some time on a 13x13 board which is a nice in between before moving onto the full expansive reality of the 19x19 go board. Smaller boards are also convenient for occasions when players are short on time and want to play through a game quickly.
- Click Here To Show Diagram Code
[go]$$c
$$ ---------------------------------------
$$ | . . . . . . . . . . . . . . . . . . . |
$$ | . . . . . . . . . . . . . . . . . . . |
$$ | . . . . . . . . . . . . . . . . . . . |
$$ | . . . , . . . . . , . . . . . , . . . |
$$ | . . . . . . . . . . . . . . . . . . . |
$$ | . . . . . . . . . . . . . . . . . . . |
$$ | . . . . . . . . . . . . . . . . . . . |
$$ | . . . . . . . . . . . . . . . . . . . |
$$ | . . . . . . . . . . . . . . . . . . . |
$$ | . . . , . . . . . , . . . . . , . . . |
$$ | . . . . . . . . . . . . . . . . . . . |
$$ | . . . . . . . . . . . . . . . . . . . |
$$ | . . . . . . . . . . . . . . . . . . . |
$$ | . . . . . . . . . . . . . . . . . . . |
$$ | . . . . . . . . . . . . . . . . . . . |
$$ | . . . , . . . . . , . . . . . , . . . |
$$ | . . . . . . . . . . . . . . . . . . . |
$$ | . . . . . . . . . . . . . . . . . . . |
$$ | . . . . . . . . . . . . . . . . . . . |
$$ ---------------------------------------[/go]
At the start of a the game, each player is equipped with a bowl containing 180 identical stones. One player uses black stones while the other player plays the white stones. The player who plays black has the privilege of making the first move, followed by white and play continues with consecutive moves back and forth. On each players turn, they have the option of laying a maximum of one stone on the board or simply passing their turn and doing nothing. When a stone is played, it is placed on one of the intersections where the lines cross one another. Therefore, every intersection you see in the picture above represents a potential move and once a stone is placed, it cannot be moved to anywhere else under any circumstances, however, it may be removed from the board if certain conditions are not met regarding that stone. Note that the nine black dots, or “star points” you see around the board are only there to help a player visually navigate their place on the board; those intersections are not special and can be played the same as any other intersection. The game begins with the empty board as shown and continues as the board is filled up with stones until one player excepts their defeat and resigns their position. The object of the game is to take control of more of the board than your opponent by using your stones collaboratively to lay claim to separate areas of the board. As you learn to properly arrange your stones, you’ll be able to place stones which are impossible to remove. The winner is the player who can get the most stones permanently placed on the board. Now that we’ve talked about the format in which the game is played, let’s talk about the three rules which dictate what a player must do to create a position of stones which cannot be altered.
The Three Rules of Stone Placement
When considering the best place on the board to place a stone, a player must mind two basic rules that govern the interaction between stones as well as a third rule which prevents a never ending game. Note that there are no sub rules, odd exceptions or limited applications of the following rules.
The first two rules of stone placement are concerned with the relationships between stones on the board and dictates the basic requirements for a stone to remain in play. When a player places a stone somewhere on the board such that the stone is not in contact with any other previously played stones, nothing significant occurs regarding the rules. However, when a player places a stone upon the vacant liberty of another stone on the board, something very important is changed about the position of that stone. When we use the term “liberty”, what we’re referring to are the intersections directly adjacent to a stone. Take a look at the following stone which has been played by black. This stone in the picture has four liberties right now which are marked with red. The liberties of a stone are the vacant intersections which sit directly adjacent to that stone. Notice that the diagonal intersections to the stone are not claimed as liberties.
- Click Here To Show Diagram Code
[go]$$c
$$ ---------------------------------------
$$ | . . . . . . . . . . . . . . . . . . . |
$$ | . . . . . . . . . . . . . . . . . . . |
$$ | . . . . . . . . . . . . . . . . . . . |
$$ | . . . , . . . . . , . . . . . , . . . |
$$ | . . . . . . . . . . . . . . . . . . . |
$$ | . . . . . . . . . . . . . . . . . . . |
$$ | . . . . . . . . . . . . . . . . . . . |
$$ | . . . . . . . . . . . . . . . . . . . |
$$ | . . . . . . . . . C . . . . . . . . . |
$$ | . . . , . . . . C X  C . . . . , . . . |
$$ | . . . . . . . . . C . . . . . . . . . |
$$ | . . . . . . . . . . . . . . . . . . . |
$$ | . . . . . . . . . . . . . . . . . . . |
$$ | . . . . . . . . . . . . . . . . . . . |
$$ | . . . . . . . . . . . . . . . . . . . |
$$ | . . . , . . . . . , . . . . . , . . . |
$$ | . . . . . . . . . . . . . . . . . . . |
$$ | . . . . . . . . . . . . . . . . . . . |
$$ | . . . . . . . . . . . . . . . . . . . |
$$ ---------------------------------------[/go]
The first rule of stone placement states that when your opponent chooses to place stones on the liberties of your own stones, those intersections taken by your opponent can no longer be claimed as your liberties. So in the following picture on the left, the black stone now only has three liberties as a result of white’s move and in the picture on the right, the black stone is deprived of three of his four liberties, leaving it with only one.
- Click Here To Show Diagram Code
[go]$$c
$$ ---------------------------------------
$$ | . . . . . . . . . . . . . . . . . . . |
$$ | . . . . . . . . . . . . . . . . . . . |
$$ | . . . . . . . . . . . . . . . . . . . |
$$ | . . . , . . . . . , . . . . . , . . . |
$$ | . . . . . . . . . . . . . . . . . . . |
$$ | . . . . . . . . . . . . . . . . . . . |
$$ | . . . . . . . . . . . . . . . . . . . |
$$ | . . . . . . . . . . . . . . . . . . . |
$$ | . . . . . . . . . . . . . . . . . . . |
$$ | . . . , . . . . . X O . . . . , . . . |
$$ | . . . . . . . . . . . . . . . . . . . |
$$ | . . . . . . . . . . . . . . . . . . . |
$$ | . . . . . . . . . . . . . . . . . . . |
$$ | . . . . . . . . . . . . . . . . . . . |
$$ | . . . . . . . . . . . . . . . . . . . |
$$ | . . . , . . . . . , . . . . . , . . . |
$$ | . . . . . . . . . . . . . . . . . . . |
$$ | . . . . . . . . . . . . . . . . . . . |
$$ | . . . . . . . . . . . . . . . . . . . |
$$ ---------------------------------------[/go]
- Click Here To Show Diagram Code
[go]$$c
$$ ---------------------------------------
$$ | . . . . . . . . . . . . . . . . . . . |
$$ | . . . . . . . . . . . . . . . . . . . |
$$ | . . . . . . . . . . . . . . . . . . . |
$$ | . . . , . . . . . , . . . . . , . . . |
$$ | . . . . . . . . . . . . . . . . . . . |
$$ | . . . . . . . . . . . . . . . . . . . |
$$ | . . . . . . . . . . . . . . . . . . . |
$$ | . . . . . . . . . . . . . . . . . . . |
$$ | . . . . . . . . . O . . . . . . . . . |
$$ | . . . , . . . . . X O . . . . , . . . |
$$ | . . . . . . . . . O . . . . . . . . . |
$$ | . . . . . . . . . . . . . . . . . . . |
$$ | . . . . . . . . . . . . . . . . . . . |
$$ | . . . . . . . . . . . . . . . . . . . |
$$ | . . . . . . . . . . . . . . . . . . . |
$$ | . . . , . . . . . , . . . . . , . . . |
$$ | . . . . . . . . . . . . . . . . . . . |
$$ | . . . . . . . . . . . . . . . . . . . |
$$ | . . . . . . . . . . . . . . . . . . . |
$$ ---------------------------------------[/go]
When a stone is in such a state as the black stone in the picture on the right, the term we use to describe this is called atari, a word which roughly translates “captured on the next move”. That’s because if white chooses on his next move to take the last liberty enjoyed by black then the black stone will be captured and removed from the board. Once a stone is removed, it may be returned to its owner to be used on a future move. What’s important is that you understand that every stone, in order to be placed on the board, and in order to remain on the board, must at all times enjoy at least one liberty. The following picture demonstrates what the board will look like after white makes his capturing move and removes the black stone.
- Click Here To Show Diagram Code
[go]$$c
$$ ---------------------------------------
$$ | . . . . . . . . . . . . . . . . . . . |
$$ | . . . . . . . . . . . . . . . . . . . |
$$ | . . . . . . . . . . . . . . . . . . . |
$$ | . . . , . . . . . , . . . . . , . . . |
$$ | . . . . . . . . . . . . . . . . . . . |
$$ | . . . . . . . . . . . . . . . . . . . |
$$ | . . . . . . . . . . . . . . . . . . . |
$$ | . . . . . . . . . . . . . . . . . . . |
$$ | . . . . . . . . . O . . . . . . . . . |
$$ | . . . , . . . . O , O . . . . , . . . |
$$ | . . . . . . . . . O . . . . . . . . . |
$$ | . . . . . . . . . . . . . . . . . . . |
$$ | . . . . . . . . . . . . . . . . . . . |
$$ | . . . . . . . . . . . . . . . . . . . |
$$ | . . . . . . . . . . . . . . . . . . . |
$$ | . . . , . . . . . , . . . . . , . . . |
$$ | . . . . . . . . . . . . . . . . . . . |
$$ | . . . . . . . . . . . . . . . . . . . |
$$ | . . . . . . . . . . . . . . . . . . . |
$$ ---------------------------------------[/go]
Note that black is now capable of playing anywhere on the entire board EXCEPT inside of the four white stones due to the fact that a stone placed there would not be able to claim a liberty, making that an invalid move.
However…
Note that in the following picture, the position is quite different. In this position, black is using his stones to deprive the white stones of their needed liberties as well such that the marked white stone is in atari, claiming only one liberty marked in blue. If it’s black’s turn, black is allowed to play on the intersection marked with blue because as soon as black makes this move, he will capture the marked white stone, giving his newly laid stone its needed liberty. In other words, when a player makes a move that deprives his opponents stone of it’s last liberty, that player is to first remove his opponents stone from the board. If after removing the enemy stone from the board, if the player is still left with a stone on the board that does not enjoy a liberty then the move made by that player would have been invalid.
- Click Here To Show Diagram Code
[go]$$c
$$ ---------------------------------------
$$ | . . . . . . . . . . . . . . . . . . . |
$$ | . . . . . . . . . . . . . . . . . . . |
$$ | . . . . . . . . . . . . . . . . . . . |
$$ | . . . , . . . . . , . . . . . , . . . |
$$ | . . . . . . . . . . . . . . . . . . . |
$$ | . . . . . . . . . . . . . . . . . . . |
$$ | . . . . . . . . . . . . . . . . . . . |
$$ | . . . . . . . . . . . . . . . . . . . |
$$ | . . . . . . . . . O X . . . . . . . . |
$$ | . . . , . . . . O C W X . . . , . . . |
$$ | . . . . . . . . . O X . . . . . . . . |
$$ | . . . . . . . . . . . . . . . . . . . |
$$ | . . . . . . . . . . . . . . . . . . . |
$$ | . . . . . . . . . . . . . . . . . . . |
$$ | . . . . . . . . . . . . . . . . . . . |
$$ | . . . , . . . . . , . . . . . , . . . |
$$ | . . . . . . . . . . . . . . . . . . . |
$$ | . . . . . . . . . . . . . . . . . . . |
$$ | . . . . . . . . . . . . . . . . . . . |
$$ ---------------------------------------[/go]
Lastly, take note of the fact that in the following picture, the black stone is completely surrounded yet remains on the board due to the fact that it still enjoys a liberty.
- Click Here To Show Diagram Code
[go]$$c
$$ ---------------------------------------
$$ | . . . . . . . . . . . . . . . . . . . |
$$ | . . . . . . . . . . . . . . . . . . . |
$$ | . . . . . . . . . . . . . . . . . . . |
$$ | . . . , . . . . . , . . . . . , . . . |
$$ | . . . . . . . . . . . . . . . . . . . |
$$ | . . . . . . . . . . . . . . . . . . . |
$$ | . . . . . . . . . . . . . . . . . . . |
$$ | . . . . . . . . . . . . . . . . . . . |
$$ | . . . . . . . . . O O . . . . . . . . |
$$ | . . . , . . . . O , X O . . . , . . . |
$$ | . . . . . . . . . O O . . . . . . . . |
$$ | . . . . . . . . . . . . . . . . . . . |
$$ | . . . . . . . . . . . . . . . . . . . |
$$ | . . . . . . . . . . . . . . . . . . . |
$$ | . . . . . . . . . . . . . . . . . . . |
$$ | . . . , . . . . . , . . . . . , . . . |
$$ | . . . . . . . . . . . . . . . . . . . |
$$ | . . . . . . . . . . . . . . . . . . . |
$$ | . . . . . . . . . . . . . . . . . . . |
$$ ---------------------------------------[/go]
The second rule of stone placement dictates what happens when a player chooses to place a stone on the liberty of his own stone. We learned in rule number one that when an enemy stone is placed on the liberty of one of our own stones, we are no longer able to claim that liberty.
However when a player places his stones adjacently together, they form a connection and are then treated as a single unit, sharing the liberties that each stone possesses.
- Click Here To Show Diagram Code
[go]$$c
$$ ---------------------------------------
$$ | . . . . . . . . . . . . . . . . . . . |
$$ | . . . . . . . . . . . . . . . . . . . |
$$ | . . . . . . . . . . . . . . . . . . . |
$$ | . . . X . . . . . , . . . . . X . . . |
$$ | . . . . X . . . . . . . . . . X . . . |
$$ | . . . . . . . . . . . . . . . . . . . |
$$ | . . . . . . . . . . . . . . . . . . . |
$$ | . . . . . . . . . . . . . . . . . . . |
$$ | . . . . . . . . . . . . . . . . . . . |
$$ | . . . , . . . . . , . . . . . , . . . |
$$ | . . . . . . . . . . . . . . . . . . . |
$$ | . . . . . . . . . . . . . . . . . . . |
$$ | . . . . . . . . . . . . . . . . . . . |
$$ | . . . . . . . . . . . . . . . . . . . |
$$ | . . . . . . . . . . . . . . . . . . . |
$$ | . . . X . X . . . , . . . . . X X . . |
$$ | . . . . . . . . . . . . . . . . . . . |
$$ | . . . . . . . . . . . . . . . . . . . |
$$ | . . . . . . . . . . . . . . . . . . . |
$$ ---------------------------------------[/go]
In the picture above, black has four different sets of stones, however, you’ll notice that the relationship between them is quite different. In the upper left, we have two stones that lay diagonally to each other. In the bottom left, we see two stones that lay adjacently to each other, yet not directly adjacent. Because of this, none of these four stones on the left side of the board have been placed on each other’s liberties (remembering that diagonal intersections to a stone are not liberties). Therefore, there is nothing special to mention about these four stones in regard to the second rule of stone placement. The four stones on the right side, however, are placed into two separates groups of stones where each group has two stones which have been placed on the liberty of a friendly stone. When this happens, these stones then become connected in that they share liberties with one another and therefore cannot be captured separately from one another. In the picture above, both of the right side groups enjoy six liberties as a result of their connection. This means that white, in order to capture either of these groups of stones, must take up all six of the liberties which are currently being claimed. If white manages to do this, then both of the stones of the surrounded group are captured together and removed from the board. There is no limit to how many stones a player can connect. In the following picture, we see a black group in the bottom left made up of eight stones which lay claim to fifteen liberties. In the bottom right, we see six black stones, connected as a group that have been placed in atari. If white were to place a stone on the last liberty at the marked intersection, he would capture and remove all six of the stones at once. In the top left, the six black stones are not connected as a single group and do not share liberties due to the fact they have been cut into two by the white stones and are not connected adjacently. Therefore, in the top left, you can count two separate black groups and two separate white groups, any of which can be captured alone, separately from the other friendly group. There will be more on cutting in chapter three.
- Click Here To Show Diagram Code
[go]$$c
$$ ---------------------------------------
$$ | . . . . . O . . . . . . . . . . . . . |
$$ | . . . . . O . . . . . . . . . . . . . |
$$ | . . . . . O X X X . . . . . . . . . . |
$$ | . . . X X X O . . , . . . . . , . . . |
$$ | . . . . . . O . . . . . . . . . . . . |
$$ | . . . . . . O . . . . . . . . . . . . |
$$ | . . . . . . . . . . . . . . . . . . . |
$$ | . . . . . . . . . . . . . . . . . . . |
$$ | . . . . . . . . . . . . . . . . . . . |
$$ | . . . , . . . . . , . . . . . , . . . |
$$ | . . . . . . . . . . . . . . . . . . . |
$$ | . . . . . . . . . . . . . . . . . . . |
$$ | . . . . . . . . . . . . . . . . O . . |
$$ | . . . . . . . . X . . . . . . O X O . |
$$ | . . . . . X X X X . . . . O O X X O . |
$$ | . . . X X X . . . , . . O X X X O . . |
$$ | . . . . . . . . . . . . . . O O . . . |
$$ | . . . . . . . . . . . . . . . . . . . |
$$ | . . . . . . . . . . . . . . . . . . . |
$$ ---------------------------------------[/go]
The third and final rule of stone placement maintains that the game must remain finite and forbids endless loops. This is necessary because there are certain positions that will often arise in game play such that if both players were willing, the game could continue on forever without progressing or deeming a victor. Thus the third rule is called the rule of ko and strictly forbids such positions. According to the rule of ko, it is illegal for a player at any time in the game to make a move that would cause an exact position of the board to be repeated a second time. Let’s go back to the analogy given during the explanation of the liberty rules:
- Click Here To Show Diagram Code
[go]$$c
$$ ---------------------------------------
$$ | . . . . . . . . . . . . . . . . . . . |
$$ | . . . . . . . . . . . . . . . . . . . |
$$ | . . . . . . . . . . . . . . . . . . . |
$$ | . . . , . . . . . , . . . . . , . . . |
$$ | . . . . . . . . . . . . . . . . . . . |
$$ | . . . . . . . . . . . . . . . . . . . |
$$ | . . . . . . . . . . . . . . . . . . . |
$$ | . . . . . . . . . . . . . . . . . . . |
$$ | . . . . . . . . . O X . . . . . . . . |
$$ | . . . , . . . . O C W X . . . , . . . |
$$ | . . . . . . . . . O X . . . . . . . . |
$$ | . . . . . . . . . . . . . . . . . . . |
$$ | . . . . . . . . . . . . . . . . . . . |
$$ | . . . . . . . . . . . . . . . . . . . |
$$ | . . . . . . . . . . . . . . . . . . . |
$$ | . . . , . . . . . , . . . . . , . . . |
$$ | . . . . . . . . . . . . . . . . . . . |
$$ | . . . . . . . . . . . . . . . . . . . |
$$ | . . . . . . . . . . . . . . . . . . . |
$$ ---------------------------------------[/go]
As explained before, in the picture above, the marked white stone is in atari and black can capture it by playing at the marked intersection. So let’s say that black makes this move and removes the marked white stone. The following picture is what the board would then look like.
- Click Here To Show Diagram Code
[go]$$c
$$ ---------------------------------------
$$ | . . . . . . . . . . . . . . . . . . . |
$$ | . . . . . . . . . . . . . . . . . . . |
$$ | . . . . . . . . . . . . . . . . . . . |
$$ | . . . , . . . . . , . . . . . , . . . |
$$ | . . . . . . . . . . . . . . . . . . . |
$$ | . . . . . . . . . . . . . . . . . . . |
$$ | . . . . . . . . . . . . . . . . . . . |
$$ | . . . . . . . . . . . . . . . . . . . |
$$ | . . . . . . . . . O X . . . . . . . . |
$$ | . . . , . . . . O B . X . . . , . . . |
$$ | . . . . . . . . . O X . . . . . . . . |
$$ | . . . . . . . . . . . . . . . . . . . |
$$ | . . . . . . . . . . . . . . . . . . . |
$$ | . . . . . . . . . . . . . . . . . . . |
$$ | . . . . . . . . . . . . . . . . . . . |
$$ | . . . , . . . . . , . . . . . , . . . |
$$ | . . . . . . . . . . . . . . . . . . . |
$$ | . . . . . . . . . . . . . . . . . . . |
$$ | . . . . . . . . . . . . . . . . . . . |
$$ ---------------------------------------[/go]
As you can see, the white stone has been removed. But notice now that the black stone marked in red which has just been placed is now in atari as well such that white could play on the marked intersection and capture it. Well, as you can tell, the position that would result from white making this move would be identical to the previous picture before black captured. Therefore, the rule of ko forbids white from making this move. Before white can capture this stone, he must first make a move somewhere else on the board. The following picture shows where white has done this and black has responded to the move made by white. Now when you look at the position, you will notice that something has changed now with the addition of the two stones in the corner. Therefore, white can freely capture the black stone in atari now without repeating a board position and will therefore not violate ko. Note however, that black doesn’t necessary have to follow white in playing in the corner. Instead, black could have placed a stone on the intersection marked in blue himself and protected his stone from atari. This brings us to one of the most exciting facets of the game of go: ko fighting. I’m not going to labor into the details of the strategy behind ko fights given that this is only a mere explanation of the rule itself, but I will mention that if white is serious about capturing that black stone in atari, then that move he made elsewhere in order to alter the board to satisfy ko needs to be such a move that black would need to respond to it in order to defend another stone or group somewhere else. A move such as this is called a ko threat and is a topic for the discussion on the strategy behind winning ko fights.
- Click Here To Show Diagram Code
[go]$$c
$$ ---------------------------------------
$$ | . . . . . . . . . . . . . . . . . . . |
$$ | . . . . . . . . . . . . . . . . . . . |
$$ | . . X . . . . . . . . . . . . . . . . |
$$ | . . . O . . . . . , . . . . . , . . . |
$$ | . . . . . . . . . . . . . . . . . . . |
$$ | . . . . . . . . . . . . . . . . . . . |
$$ | . . . . . . . . . . . . . . . . . . . |
$$ | . . . . . . . . . . . . . . . . . . . |
$$ | . . . . . . . . O X . . . . . . . . . |
$$ | . . . , . . . O X C X . . . . , . . . |
$$ | . . . . . . . . O X . . . . . . . . . |
$$ | . . . . . . . . . . . . . . . . . . . |
$$ | . . . . . . . . . . . . . . . . . . . |
$$ | . . . . . . . . . . . . . . . . . . . |
$$ | . . . . . . . . . . . . . . . . . . . |
$$ | . . . , . . . . . , . . . . . , . . . |
$$ | . . . . . . . . . . . . . . . . . . . |
$$ | . . . . . . . . . . . . . . . . . . . |
$$ | . . . . . . . . . . . . . . . . . . . |
$$ ---------------------------------------[/go]
So there you have it! A complete explanation of the basic conditions for placing stones and the primary objective for winning the game. You’re now ready to plunge into the endless study of strategy that puts these rules to their best use. As a last note, I will mention that there is one other stipulation that is commonly found in the game yet is also optional. Due to the fact that the player who plays white is at a disadvantage due to moving second after black, it is common for the objective of the game to be slightly altered in order to compensate white for his second move. As I told you before, the object of the game is to place the most stones on the board without them getting captured and removed. Well, black’s first move advantage can be balanced out by restating the objective as follows: Black must get X number of stones more than white on the board in order to win. The value of X can change depending on the event and the skill level of the players but its typical to give white a compensation of seven stones meaning that black must get eight more stones than white on the board in order to win. Also, as a final compensation, it’s very common for players to agree that any game ending in a draw will be awarded as a victory to white. Though the game of go is ages old, this concept of compensating white has only been put to use in the last century and is widely agreed upon as necessary to create a more fair game between the competitors.
[I believe I've covered everything there is to cover in this chapter regarding rules with the exception of getting into the different rule sets used. In my opinion, anything else that there is to talk about concerning this game would fall under the categories of strategy, tactics and jargon. I'd be interested to know if anyone disagrees and why]